Veyo Installation & Setup
Install the Veyo on-premise stack and configure it with the interactive setup wizard. Before you start, make sure PostgreSQL is installed and the veyo_admin role exists — see PostgreSQL Installation.
1. Download and extract the package
Download the most recent version from veyomcp.com/onpremdownload.html for either Windows or Linux.
Extract the archive contents into a suitable folder on the computer that will host Veyo On-Prem.
2. Run the setup wizard
Run the orchestrator executable from a terminal window. You will need:
- Your PostgreSQL username and password. The user needs create database permissions (the
veyo_adminrole created earlier satisfies this). - The IP address or DNS name and port of your PostgreSQL instance, connectable from the machine running the Veyo executables.
On first run, the orchestrator detects that no config file exists and launches a setup wizard to create one with the correct settings for your environment.
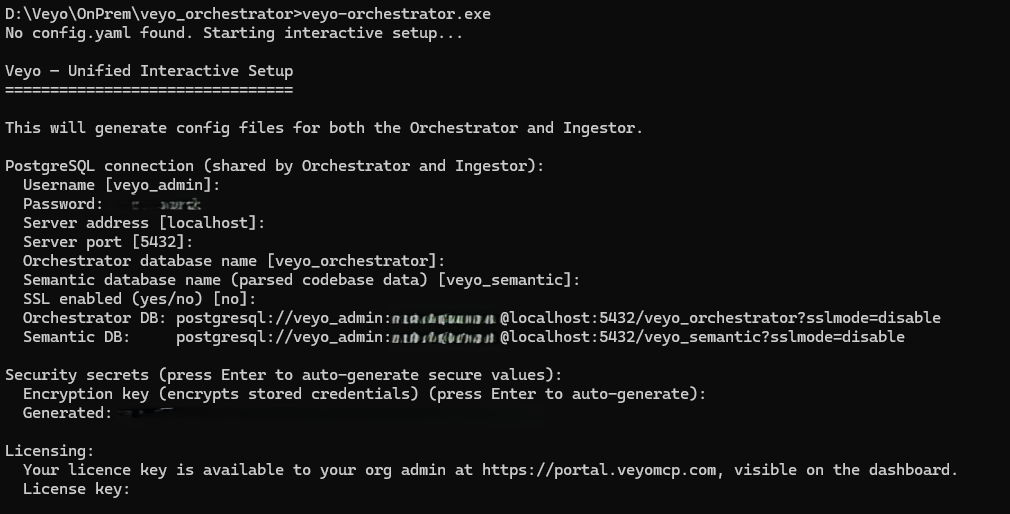
All values except the licence key and password show a suggested default in square brackets [] — press Enter to accept it, or type the correct value for your environment.
| Prompt | What to enter |
|---|---|
| Username | Database username with create database permissions. |
| Password | The password for that PostgreSQL user. |
| Server address | The IP or DNS address of the PostgreSQL instance, connectable from the setup machine. |
| Server port | PostgreSQL defaults to 5432. Yours may listen on a different port, or you may be using PgBouncer — recommended if you will have a lot of users connecting. |
| Orchestrator database name | veyo_orchestrator, unless you want a different name. |
| Semantic database name | veyo_semantic, unless you want a different name. |
| SSL enabled | Defaults to no for standard, simple on-prem setups. |
| Encryption key | Just press Enter and allow it to generate one. |
3. Licence key
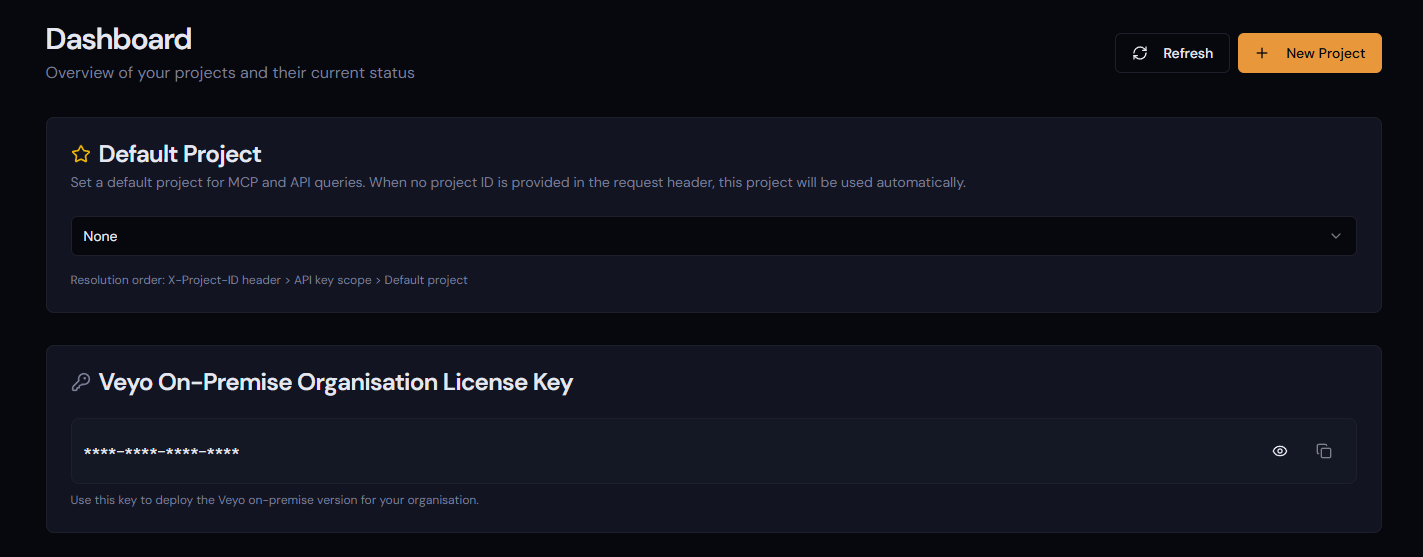
Your licence key can be obtained by the organisation admin by logging in to portal.veyomcp.com — it is shown on the dashboard.
4. On-premise sign-in (OIDC)
Enter the full URL that users on your network will use to open the on-premise portal. For example, if you are installing on a server available on your network as DEV1, you could enter http://dev1:8000.

You may want to run a reverse proxy like Caddy if you would prefer the portal be accessed over HTTPS. But even if the portal runs on unencrypted HTTP, the authentication flow takes place between the client, portal.veyomcp.com, and Clerk — fully encrypted.
The wizard then completes and creates the config files, and the orchestrator starts.
5. Register the installation
On your first connection in a browser, you will be told the installation needs to be registered:
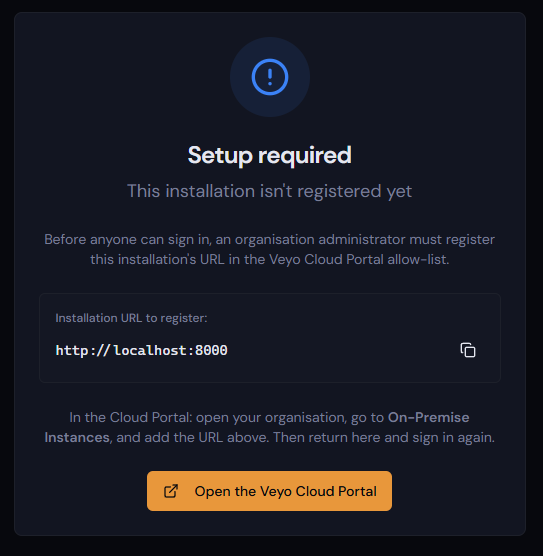
- The organisation admin logs in to portal.veyomcp.com.
- Select Organisation.
- Select the name of your organisation.
- Scroll down to On-Premise Instances, enter the URL the on-premise warning provided, and press Add.

- Close the browser window on the on-premise instance and open the on-premise URL again. You will now be shown a sign-in screen.

- Follow the authentication flow, allowing the Veyo On-Prem OIDC app. You can then sign in to your on-premise instance with exactly the same login details as portal.veyomcp.com.
6. Start the ingestor
The orchestrator is not the only executable Veyo needs — the ingestor must also be running for code to be ingested into the semantic database. Without it, repositories and System Repositories will queue for ingestion but never complete.
The ingestor was extracted from the same package into a folder called veyo_ingestor. As long as the orchestrator setup wizard was run, the ingestor needs no further configuration — simply run the ingestor executable and it will just work.
Setup is now complete. Continue to the On-Premise Portal documentation to start using your instance.